FileZilla を利用してファイルを転送する
はじめに
本項(このチュートリアル)では代表的な SFTP クライアントであるフリーソフトウェアの FileZilla を利用したファイル転送の方法をご説明いたします。 FileZilla のインストール方法やここではご紹介しない操作方法については FileZilla 公式サイト をご確認ください。
当社では FileZilla を含むサードパーティ製ソフトウェアに関する動作保証やサポートは提供しておらず、お問い合わせをいただいても回答致しかねる場合がございます。
RS2 Plus タブを開く
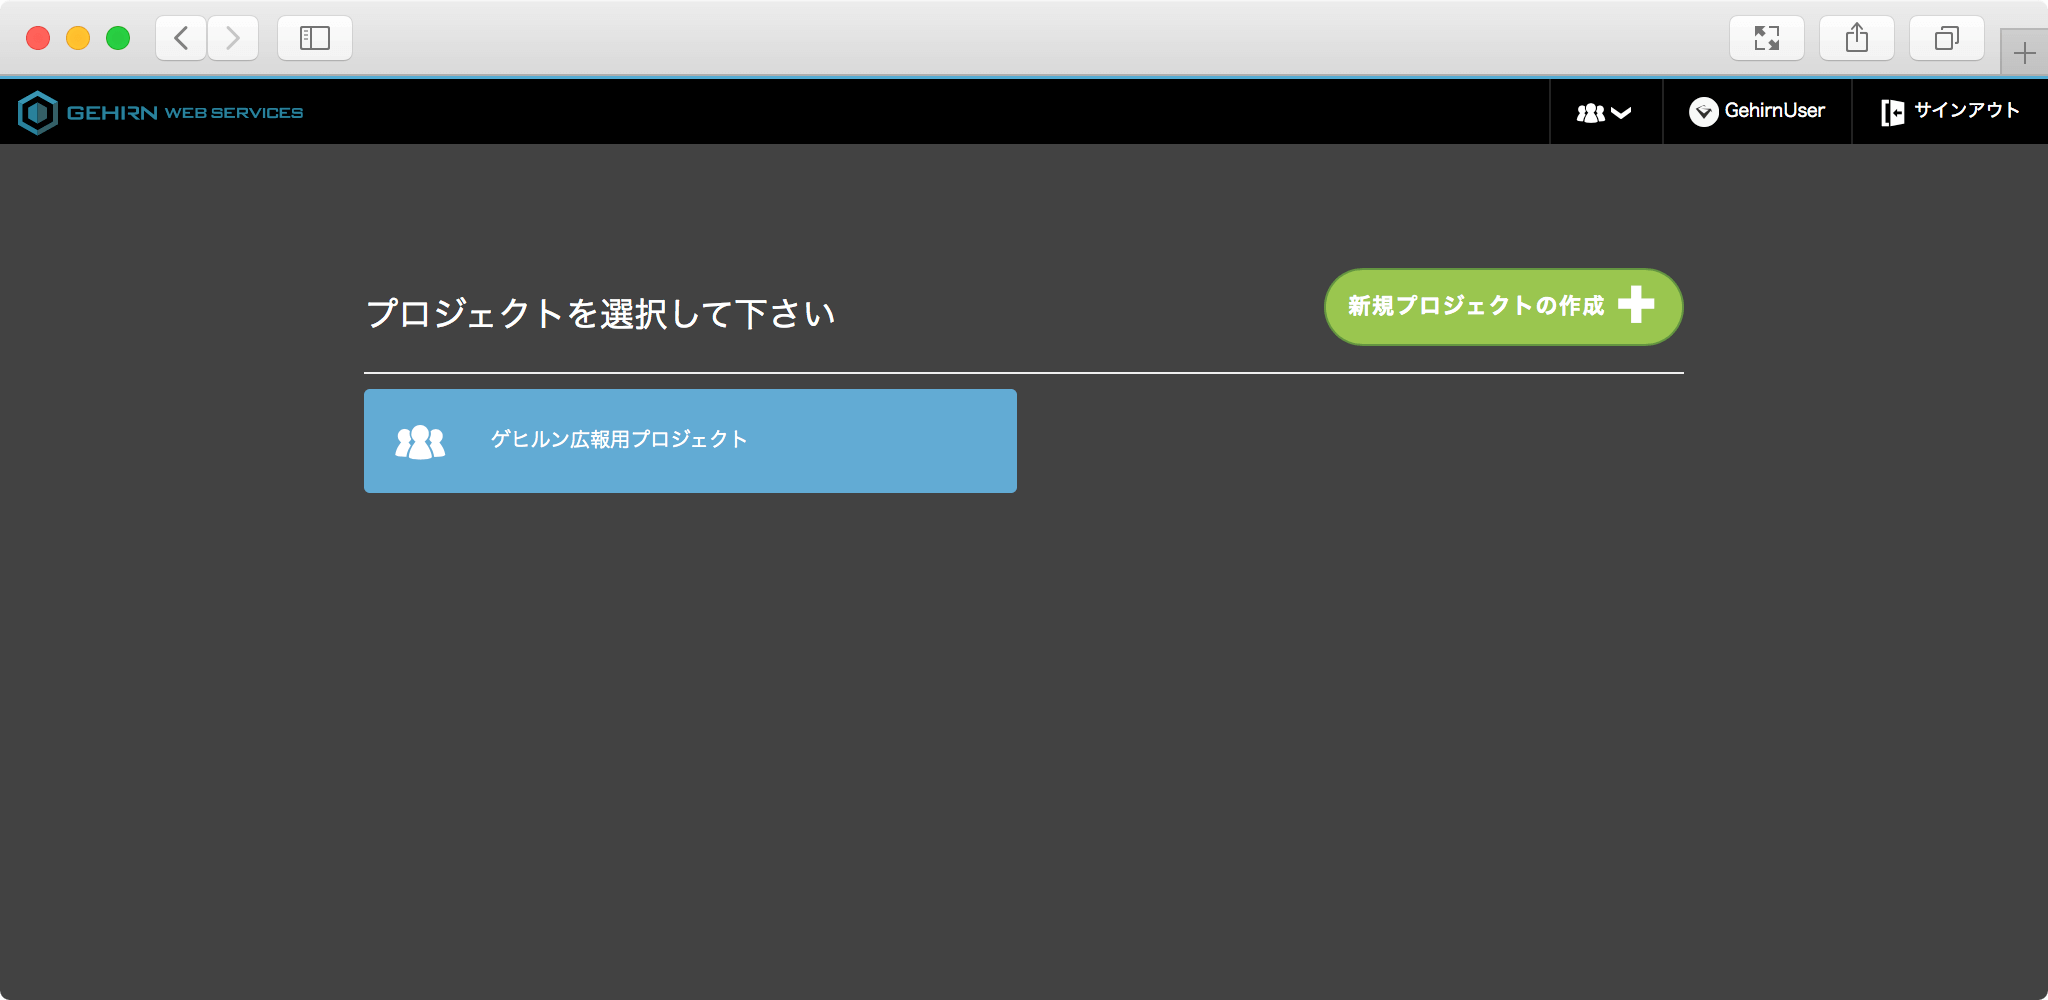
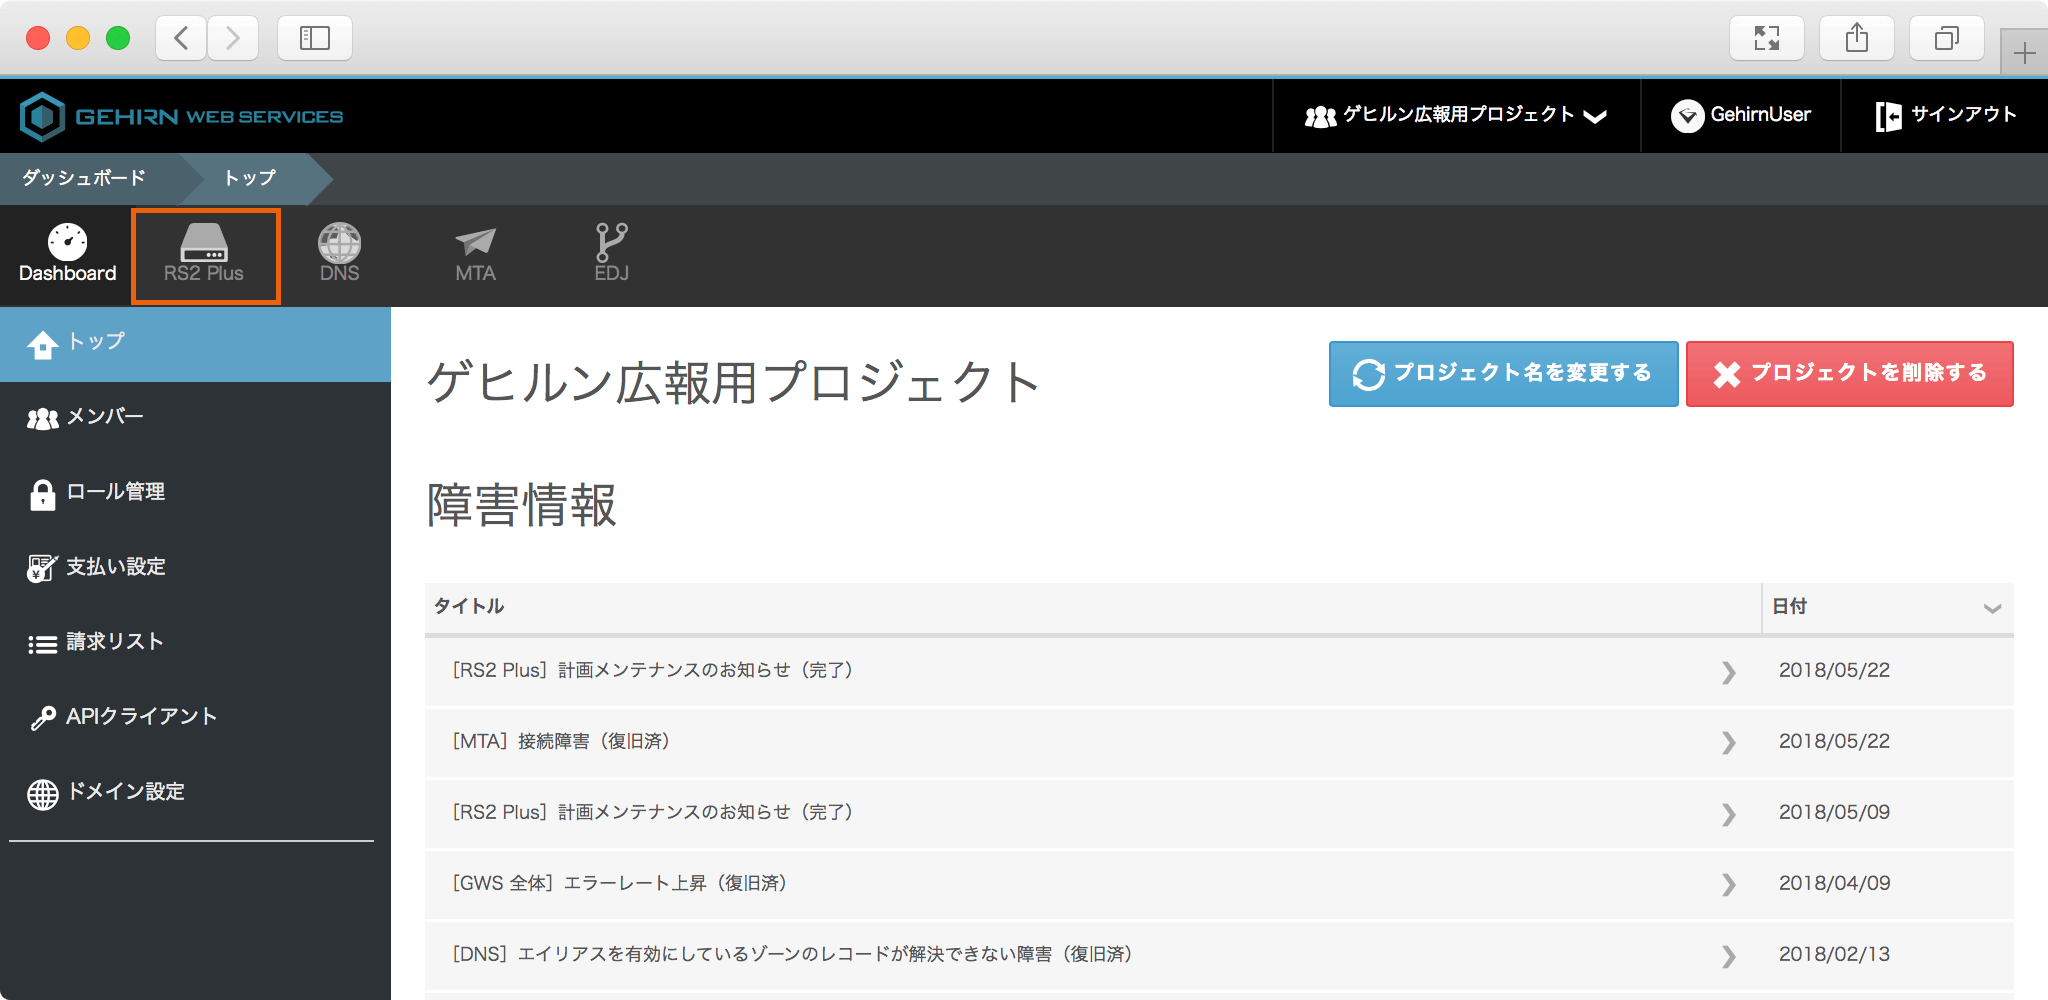
GWS Web コンソール を開いて、操作対象のプロジェクトを選択してから、RS2 Plus タブを開きます。
対象のアカウントの UNIX ユーザタブを開く
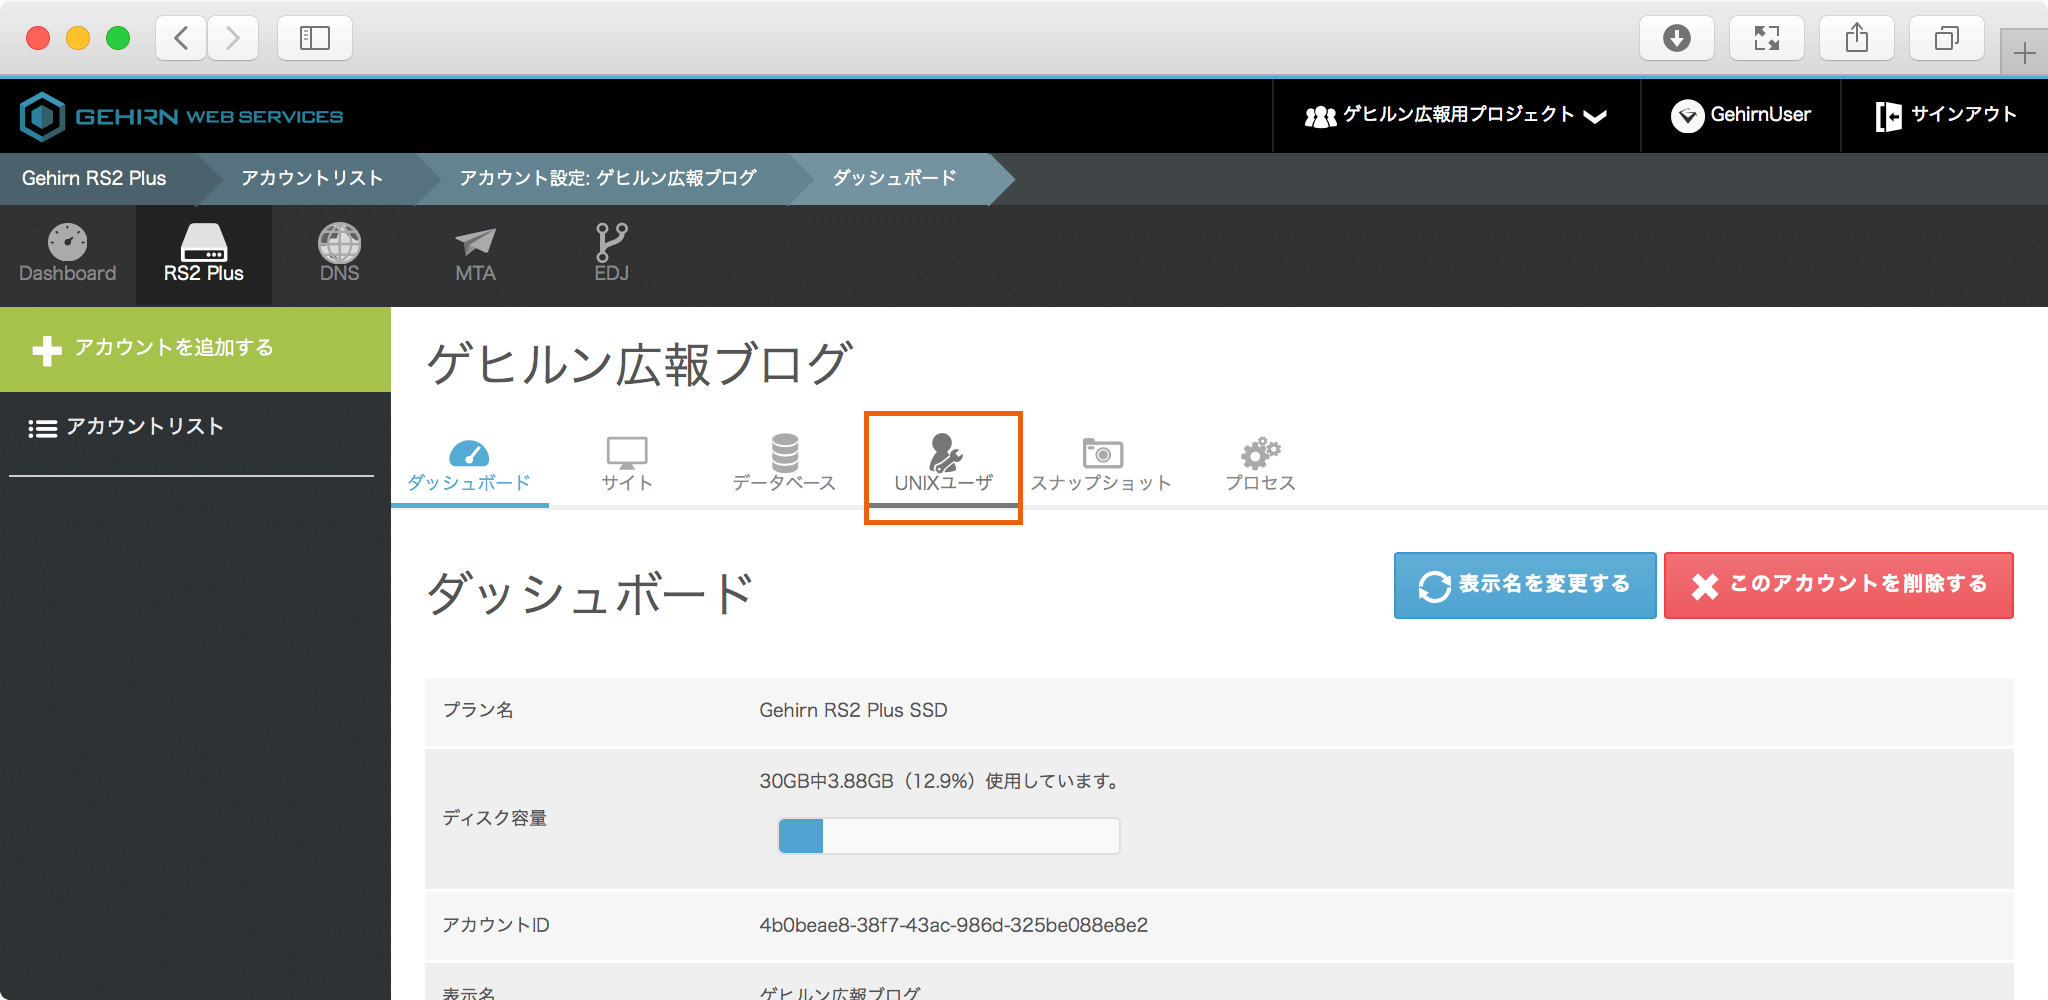
契約一覧の画面から対象のアカウントを開いて、UNIX ユーザタブを選択してください。
ユーザを選択する
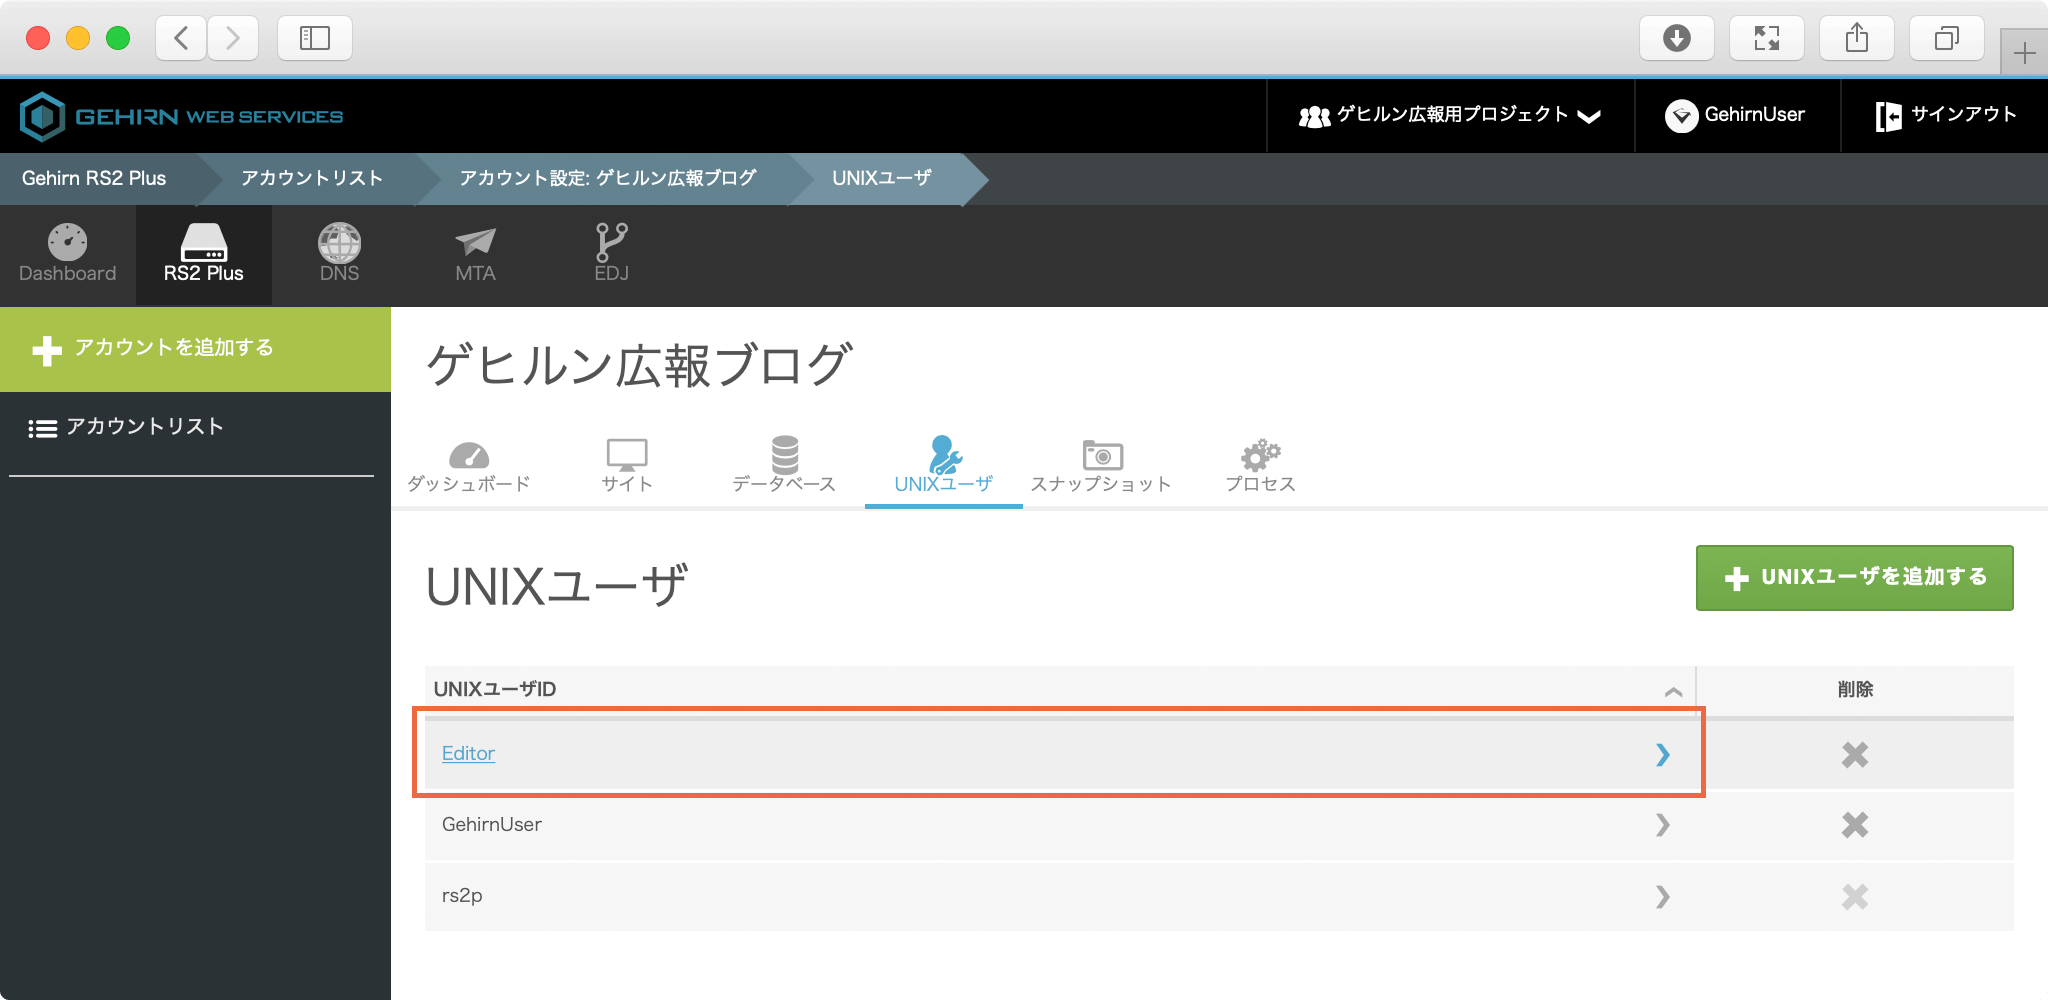
設定したいユーザを開きます。
SSH コマンド例を控える
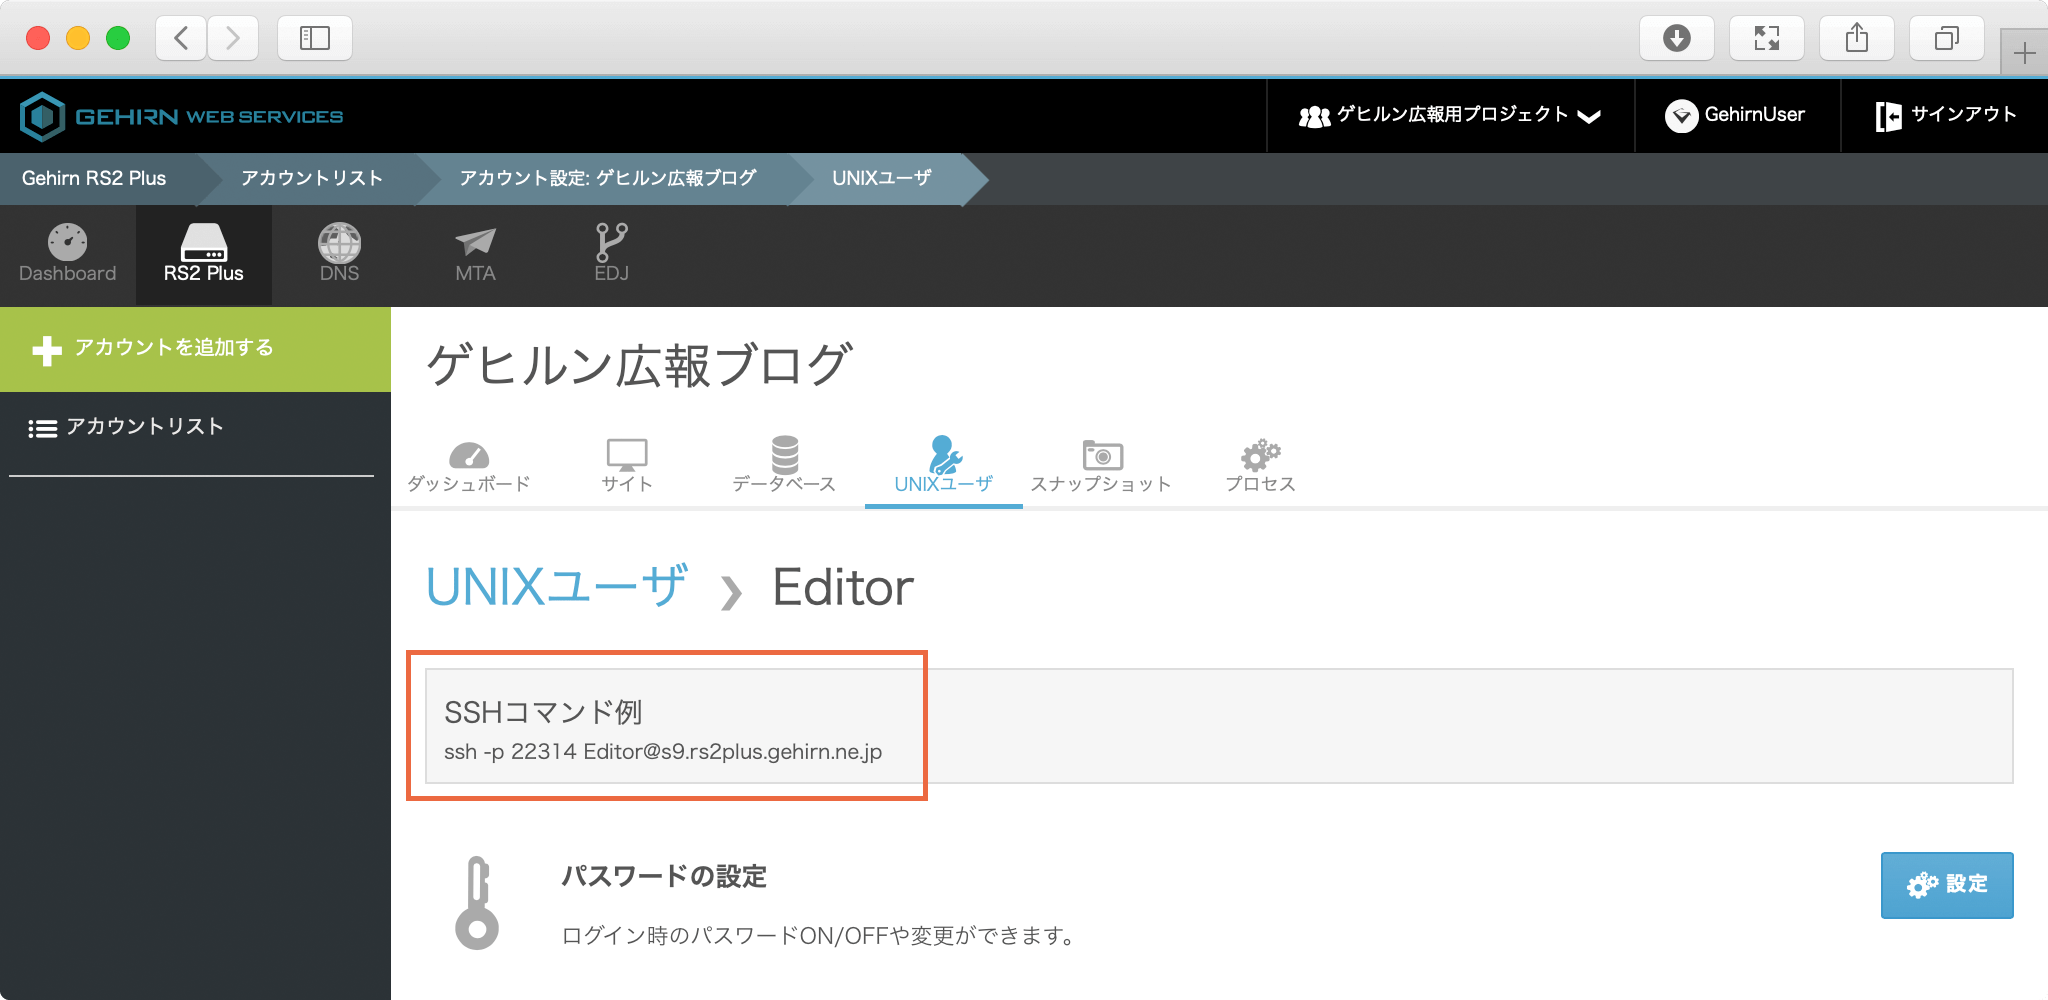
SSH コマンド例のポート番号とホスト名を控えます。
FileZilla を実行する
FileZilla を起動します。
FileZilla を設定する
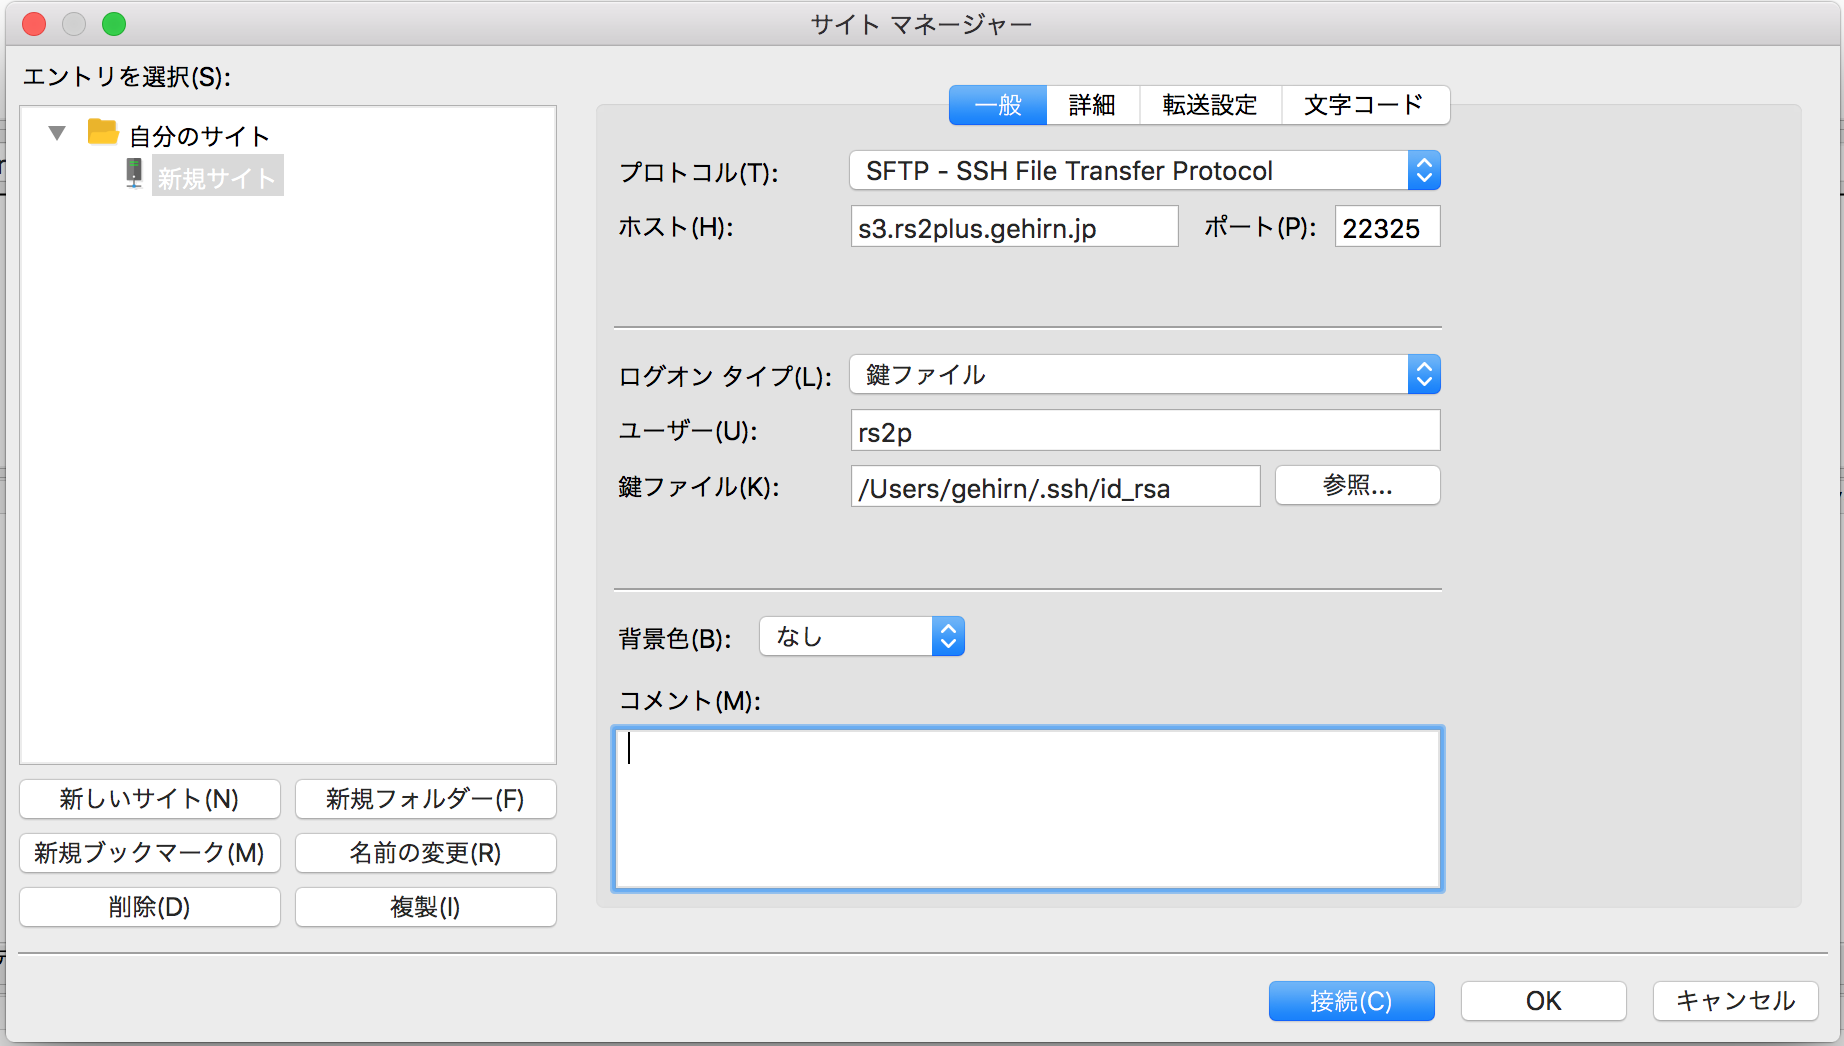
控えた情報を使用して、FileZilla のホスト情報を上のように設定します。